Thursday, July 31, 2014

Dai un' occasione all'amore

The title - "Taking a Chance On Love" in the language of love - Italian!  The pattern now has an Italian version.


Much gratitude to Lucia (Novembre on Ravelry) for her help with translating the pattern into Italian.
Lucia asked if I would like it to be translated into Italian since she was knitting the shawl.  Of course!
It was a vanity thing with me since any affiliation with Italian just sounded so lovely and I wish I can move to Italy.  But, she was doing it not only as a favor to me, also for very a generous reason.  She said she wanted to translate it so knitters like her mom can knit it too.

I never really thought about it.  I mean, sure I thought about it from my point of view before. "Hey, wouldn't it be great if I can get my patterns to the Italian audience."  But I never thought about it from a knitter's point of view. There is this whole wealth of pattern out there, and majority are in English, whereas so many knitters around the world cannot access them because of language.

You'd think I ought to know that since English is my second language.  And if my mom knits (haha, that's an unlikely funny image, mom has absolute no zero interests in making anything, not even cooking,) she wouldn't be able to follow my patterns either.

I'm grateful to have this opportunity so that knitters who speak Italian can have access to one more pattern. Thank you Lucia!


Saturday, July 26, 2014

Something to Wear


Finally, I made some outfit that's totally me, casual and relax.

The pants, oh, I LOVE the pants!  I drafted the pattern for a roomy fit around hips and thighs and tapered at mid-calf.  The fabric was linen from stash.  The design detail I added was the narrow, triangular button band cross from the waist dart on one side to the other.  It has front pockets.  I was really, really thrilled how well it fits.  Sewing went smoothly because I'd learned to be patient and think twice before any seaming.


To complete the outfit I made 2 tops out of some fabric recently purchased at Joann's, a wonderful, soft, woven cotton with super thin stripes.  The pattern was drafted very quickly since the overall shape was very basic.

For the first top, the design detail was the crescent shape at the front neck, and soft pleating on the back. and the curved upside down crescent hem at the front.


Since I still had enough fabric left, I made the second top using the same pattern with even roomier fit than first one, as well as slightly wider neckline. The crescent keyhole detail was modified a bit so the 2 sides are not met at the same height. The hem on both front and back are upside down crescent shape. The pleating was moved down to top of waistline on the back.


I love these 3 pieces.  Totally something I'd wear. They're my type of wardrobe, no fuss, easy to wear, relax, with little details to add interest but not overpowering.  I love the cotton fabric so much that I went and bought 2 more yards of it.  I'm ready to to make more of similar type of clothing. 


Sunday, July 20, 2014

Dress in Lavender


The second one did not go as quickly as I thought it would.
Adding lining to it was not the problem, even with the lining skirt using darts rather instead of gathering like outer fabric.

After patting myself on the back for sewing fabric and lining to the invisible zipper successfully and beautifully, I realized the bodice was a bit loose at each side. That could've been easily solved by taking in the fabric a bit at each side if only the zipper was not sewn in already. GRRRRGH. After cussing at myself few times, I ripped back half of zipper length and the other sideseam, re-sew and tried on the dress again.

I was soooo mad at myself! I got a bit enthusiastic with taking in the sideseams and took in just a smudge too much, like, 1/4 inch too much on each side. Even a little too much was too much. It felt tighter on the bust than I'd like. I had to walk away from sewing to calm myself down.

After some thoughts, I cut a slit at the back to see how it fits. Thank goodness it fitted great. I just had to come up with a design to make the cut look intentional and I went for a curved opening. An hour into fixing the problem, I'd finally redeemed myself.


The fabric was from Mills End.  It's woven cotton in a pale lavender with subtle prints. I used matching solid cotton for the lining. For waistband and shoulder strap, I went with dark brown print from my stash.


I ended up quite happy to have a different back for this dress than the first one.
Probably I learned some lessons here somewhere, but I have a tendency of not learning from my mistakes.

Now I have 2 dresses with no occasions to wear...  It's time to sew something I'd wear more often.


Thursday, July 17, 2014

I'm Having a Blast Sewing


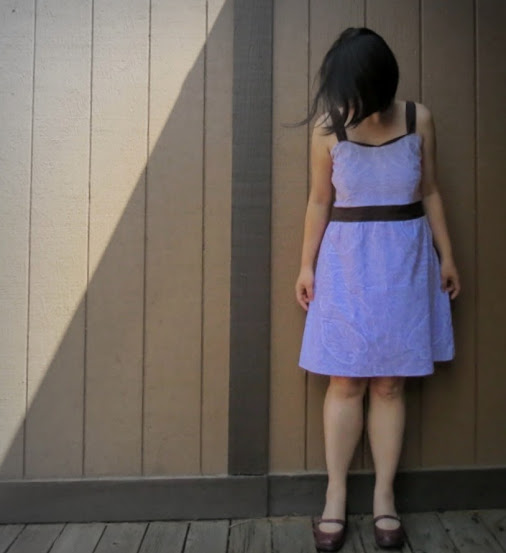
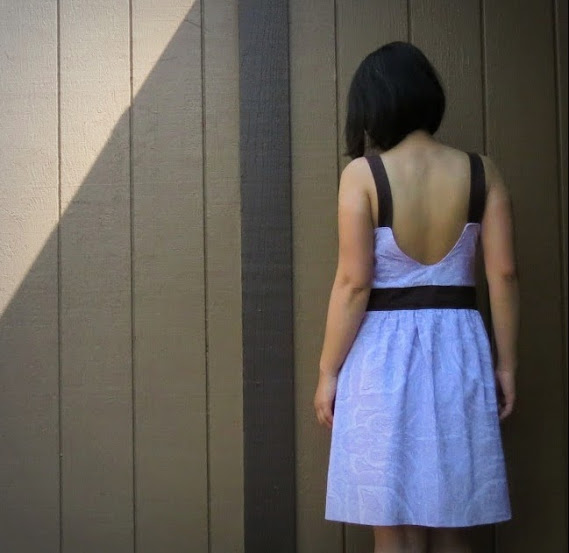
I realized I like designing, making clothes, way more than wearing them.  Crazy, but that's me.  Continuing the trend of making things even though I knew ahead of time that I may not wear it much, I made a dress that I think is so pretty.  So pretty that it wouldn't fit into my regular my wardrobe style.  But I really wanted to make it.

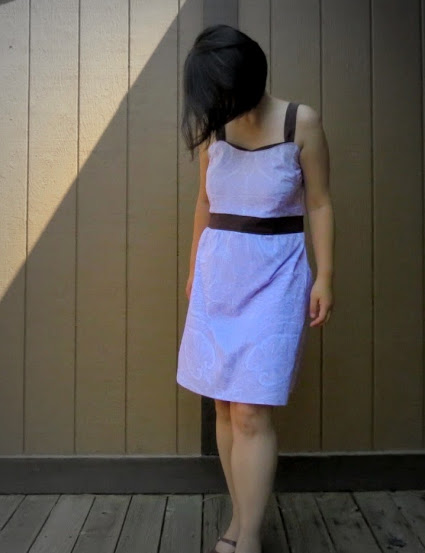
Days ago, I was antsy about sewing, so I looked through my stash and found this aqua print.  I thought, why not a dress?  Well, as it turned out I had only 1 1/5 of this 45" fabric. Hmmm. all of sudden I remember I bought it to make a skirt. Oh well, it wanted to be a dress!  So I dug out some yellow thin cotton I had for contrast waistband and shoulder straps.

The drafting part went quickly enough.  I re-measured myself to ensure better fit.  I didn't want the dress to be super tight, but it's woven cotton so there is no give.  There were only 3 major pieces of paper pattern involved, the top front, top back and identical skirt front/back. I just cut the shoulder straps and waistbands with rotary cutter to the width I wanted and adjusted the length as I sew.


One trick I realized I could do when cutting pattern was to cut out the areas for darts.  I truly dislike tracing points for darts and connect them by ruler, or other methods of doing it, all too tedious for my impatient self. By cutting out the areas, I just have to draw directly onto the fabric.  The paper I have is obviously a lot stiffer than commercial pattern papers.  But I can see using tape (the transparent kind for gift wrapping) to tape over the dart lines before cutting the the triangular darts away.  I'm so pleased with this method.  Yes, I love shortcuts like that.


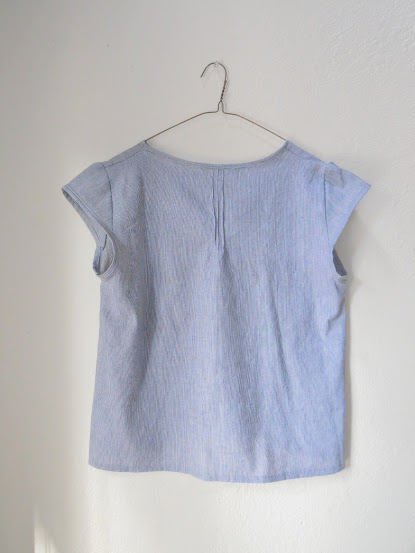
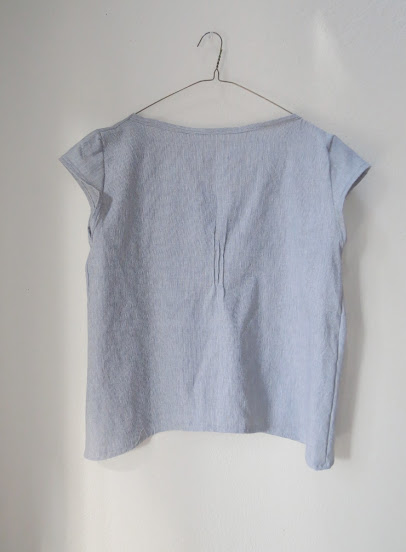
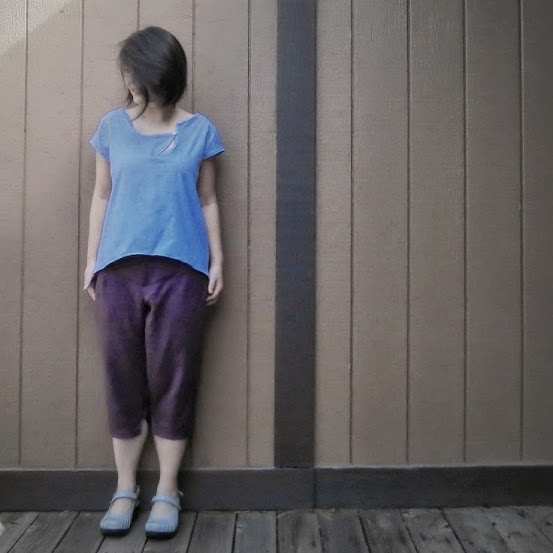
I put the invisible zipper at the left side seam.  After a day of working on it I couldn't decide what to do with the bodice neckline to make it slightly more interesting without too much frills. I slept on it. The next morning I woke up to the idea of little contrast peek out color.  First try was using serger to finish that part. Wrong. after coupla tries, I realized I can top stitch the fabric to the facing with contrast color sandwiched between them. It took some time for me to figure that out, but in the end it was worth it.


I went for the gathering of skirt at waist rather than darts because I a less structured look. It ended up perfect and made cutting and sewing easier too.
The fit came out great, fitting but not too tight. The pattern wasn't perfect, I did do adjustments as I went.
Even if it's a too sweet for my wardrobe style, I like making it so much that I'm already getting the fabric out to cut for the second one.


Saturday, July 12, 2014

Two Dresses


We're in Reno this week, and I took the opportunity to stop by Mills End to get some heavier knit fabric for a dress. I'd been wanting to make a form fitting dress with tall neck for a while.  Don't know what possessed me, since I knew well I probably wouldn't wear it much as I'd be too self-conscious to wear close fitting clothes. But I really wanted to make one, in knit.

I found a lovely coral color fabric, and bought 3 yards of it.


I made the first dress and drafted pattern based on my measurements.  I did end up re-sew the seams on the side to make it very fitting. Why not, I figured. I did raglan style sleeves.  I used my wonderful serger for all seams, and sewing machine for darts. It turned out fitting well with slight negative ease. I really like it even though I kinda suspect it's gonna sit in the closet unworn for a while.  And yes, I sucked in the tummy for the pictures.


With enough yardage left to make another dress.  I decided to make one that I may actually be not too self-conscious to wear.  And to be opposite of the first one, the second dress was aimed to be baggy with set in sleeves. I also added pockets, and lengthen the neck a bit taller.  Yes, I love this neckline very much.  It's one frequent recurring neck in my designs. After drafting the pattern, I cut the pieces, the pockets were improvised after cutting.  Not really the best sewing job on the pockests but the dress is baggy enough to not draw too much attention to all the imperfections.


One tip I learned recently was to sew set-in sleeves in flat.  Meaning, sewing front to back at shoulder seams first, then sew the sleeves from the shoulder to the underarm on front and back separately.  Finally, join front to back by sewing from sleeve cuff to underarm, then from underarm to hem.  This is such a great tip that makes sewing set-in sleeves a breeze.  It's the way garment industry sew, and I don't know why regular sewing books and patterns don't teach it this way.  It's always such a daunting task to sew the sleeves on to the body when the side-seams are already sewn together.

I think dress looks kinda mod.  I modeled it with tights, I'd imagined wearing it with leggings would be more suitable for me, as the dress length was unusually short for my style due to the yardage left after first dress. However, if it was too much much longer, it would probably look more like a maternity dress than a mod dress.

Both dresses came together in one day.  I'm really happy that I finally got some sewing going for the summer.


Monday, July 7, 2014

First Note Pattern


A new shawl pattern First Note is now published!

I first knitted the shawl in the gradient yarn I dyed.  After written up the pattern, I again knitted in solid color using The Plucky Knitter - Primo.  The color is a very vibrant red. As much as l liked the first version, I felt the need to have one in solid color to showcase the lace pattern more clearly.

It has been a while since I knitted this one, so honestly, I can't think of much to write abut...


Many thanks to Vaida, Virgina, Tatjana, and Valentina. They offered tremendous help for test knit, and even voluntarily to knit from written instruction over chart.  I can't express enough how lucky I feel to have found these amazing testers.

The pattern was also tech edited by wonderful Sashka (aka Sashkaknits on Ravelry.)


Summer is rolling.  I have been busy, knitting and designing, just a bit lazy to take pictures and post things. The only bummer is I have not been sewing as much as I'd planned. Oh well, it's all good.